Skip to content

2013 Nottingham Workshops Begin

live7_ukF

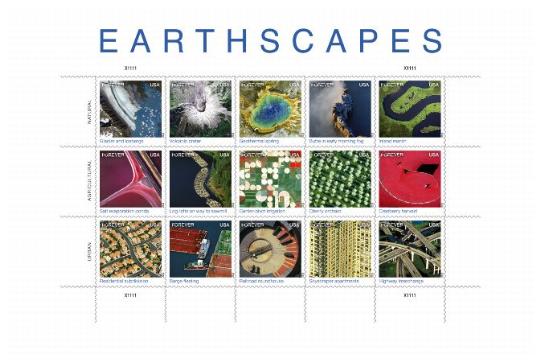
Earthscapes USPS

earthscapes_kit_1

Data Characterization and the Live

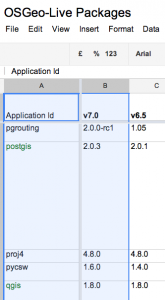
People may already know about the OSGeo Live project. Its a great base as a VM since a) it is stable and very well tested, and b) it has much software installed, but in a way that is transparent through install scripts, so customization is as straightforward as it gets..
some_7_pkgs_image

I was faced with a bit of “data mining” prep, so I pulled out the OSGeo Live and set up a VM. I use VirtualBox and its GUI on my desktop i5 quite a bit. I made a new VM, gave it two cores and 1G of RAM, bridged networking instead of NAT, and set the CD storage to point to a nice new Live .iso.

There are quite a few PostgreSQL 9.1 pl-language extensions as packages for Ubuntu, but not much for 9.2 apparently, (precise, raring and the XUbuntu precise Live all use 9.1), and of course little for the 9.3 as of yet.

Since a rockin’ R environment is already pre-built on the OSGeo Live, I didnt have to think about that.. I installed this package and used my formula from a previous post. Dont forget to set Postgres to use more RAM (this is the generic formula I use to set System V memory limits on Linux in /etc/sysctl.conf )


#!/bin/bash
mem_bytes=`awk '/MemTotal:/ { printf "%0.f",$2 * 1024}' /proc/meminfo`
mem_max=`expr $mem_bytes / 2`
page_size=`getconf PAGE_SIZE`
shmall=`expr $mem_bytes / $page_size`
echo \# Maximum shared segment size in bytes
echo kernel.shmmax = $mem_max
echo \# Maximum number of shared memory segments in pages
echo kernel.shmall = $shmall


## /etc/postgresql/9.1/main/postgresql.conf

# - Connection Settings -
.....

max_connections = 24 # (change requires restart)

.....

# - Memory -

shared_buffers = 240MB # min 128kB
# (change requires restart)
temp_buffers = 16MB # min 800kB

work_mem = 160MB # min 64kB
maintenance_work_mem = 128MB # min 1MB
max_stack_depth = 3MB # min 100kB


But, after waiting 160 seconds for some descriptive stats on a column of 900,000 floats, a dozen times.. I was searching around for better performance..


SELECT max(a.res),avg(a.res),median(a.res),min(a.res),sd(a.res)
FROM
( SELECT (pop_hs_diploma_pct *100)::integer as res
  FROM my_excellent_adventure_table
  WHERE pop_hs_diploma_pct > 0.01 ) a;

 max |         avg         | median | min |        sd        
-----+---------------------+--------+-----+------------------
  63 | 12.5609578591567519 |     12 |   1 | 6.88020337480763

SnowMan pointed out a short rant from a few years ago, but actually, pl-R is still slow!

Then I found this post and the corresponding project. I compiled, built and it worked just fine. Thx InterWeb!


--
SELECT
  min(pop_age65_up::integer),
  quantile( pop_age65_up, ARRAY[0.25, 0.5, 0.75]),
  avg(pop_age65_up::integer),
  max(pop_age65_up::integer)
FROM
  my_excellent_adventure_table
WHERE pop_age65_up > 1;

 min |      quantile          |   avg  | max  
-----+------------------------+--------+------
   1 | {2.4556,4.7930,8.5264} | 8.6491 | 3878

AmpCamp 3 – HDFS

Hadoop-blue-200x200

As described in a previous post, I used Cloudera .debs to install Hadoop/HDFS on an Ubuntu 12.04 ‘Precise’ single node. Now, to put some data into the HDFS system and use it. (note- this did not work in a 32bit VM)

The Hadoop/HDFS install consisted of two steps: obtain and install .deb cdh4-repository, which enables a suite of other packages (perhaps auto-magically updated); then use those packages to install the features you want.

apt-get update shows the Cloudera repository in the list.

Hit http://archive.cloudera.com precise-cdh4 Release.gpg
Hit http://archive.cloudera.com precise-cdh4 Release
Hit http://archive.cloudera.com precise-cdh4/contrib Sources
Hit http://archive.cloudera.com precise-cdh4/contrib amd64 Packages
Ign http://archive.cloudera.com precise-cdh4/contrib TranslationIndex
Ign http://archive.cloudera.com precise-cdh4/contrib Translation-en_US
Ign http://archive.cloudera.com precise-cdh4/contrib Translation-en

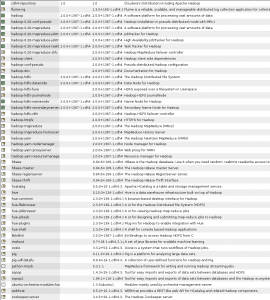
Packages look like this:
CDH4-all-pkgs

Some quick reading shows I have at least two choices to easily interface to HDFS. One is the hue suite, and another is an HDFS Fuse interface. More options are listed on this MountableHDFS page.

Cloudera supplies an HDFS Fuse mount with their system. Instructions on how to use the FUSE extension are here.

When HDFS is running with this system (with or without FUSE) you can view a web interface at port 50070. A port list here.

after mucking with the environment a bit

Exception in thread "main" java.lang.IllegalArgumentException: Invalid URI for NameNode address (check fs.defaultFS):

I was getting an error when trying to start the secondarynamenode, that the namenode had an invalid address. so, investigating:

update-alternatives --get-selections | grep hadoop
hadoop-conf auto /etc/hadoop/conf.empty

less /etc/hadoop/conf.empty/core-site.xml

core-site.xml turned out to be missing the actual namenode name,
which was not apparent in the doc I was reading.. So, edit
/etc/hadoop/conf.empty/core-site.xml and add a name and value property xml tags. The system starts up after this change.

<configuration>
 <property>
  <name>fs.default.name</name>
  <value>hdfs://127.0.1.1:50070</value>
 </property>
</configuration>

AmpCamp 3 – The Stack

spark-project-header1

The Berkeley Data Analytics Stack (BDAS) was the central subject at AmpCamp 3.

Spark is the core of the stack. It has been recently adopted for incubation as an Apache Project. True to form for a fast-moving OSS project, we actually used the 0.80 git repo version, rather than the 0.73 that you will find on the Apache site.

Scala_logo

Spark is built on Scala, which runs in a Java VM. All the lab exercises used openJDK7, and they ran very very well. (we moved all of the OSGeo Live java projects to openJDK7 last December or so, and have never looked back)

Among the components of BDAS, I got the sense that Spark and Mesos were most stable, with Shark (the SQL interface ) and pySpark (the python interface ) also strong.. The in-memory filesystem Tachyon was presented as clearly in early stages, as well as the very interesting GraphX, MLBase and BlinkDB.

All the lab exercises were executed in an Amazon Web-Services (AWS) cluster. Thanks to excellent tech and teamwork, the labs flowed smoothly both days. However, I was interested in bringing up the BDAS stack on my own machines. Here is what I did to do that:

* make a working directory, I called mine amplab3

* I found that java -version showed 1.6 even though I had installed 1.7. So I used these two steps to change it:

dbb@i7c:~/amplab3$ update-java-alternatives -l
java-1.6.0-openjdk-amd64 1061 /usr/lib/jvm/java-1.6.0-openjdk-amd64
java-1.7.0-openjdk-amd64 1051 /usr/lib/jvm/java-1.7.0-openjdk-amd64

sudo apt-get install icedtea-7-plugin
sudo update-java-alternatives -s java-1.7.0-openjdk-amd64

* Install Hadoop from Cloudera (CDH4) via .debs, following these instructions

* verify the Hadoop install by starting it

sudo service hadoop-hdfs-namenode start
sudo service hadoop-hdfs-secondarynamenode start

* I did not use an Ubuntu package for Scala. I used openJDK7 from repository, then got Scala here, unpacked scala-2.9.3.tgz in the working directory.

* git clone https://github.com/mesos/spark.git

* cd spark; cp conf/spark-env.sh.template conf/spark-env.sh

* add SCALA_HOME=/path/to/scala-2.9.3 to conf/spark-env.sh

* sbt/sbt assembly

You should be ready to go! Of course, I did a few extra things, and I took many detours along the way, but that was about it. In particular, I found that the hadoop data directory in this setup is under /var/lib/hadoop-*, so I created an alias for that and pointed to a fast local disk with plenty of free space. You may use the conf files in /etc to get the same effect, but I did not want to change things at a fine level yet.

Once spark or pyspark is running, you can hit port 3030 4040 with a web browser for an interface to the engine. Other useful docs here:

http://spark.incubator.apache.org/docs/latest/configuration.html
http://ampcamp.berkeley.edu/exercises-strata-conf-2013/index.html

AmpCamp 3 – Intro

pg_logo

I cannot say enough about AmpCamp 3, a two day workshop at UC Berkeley that has just completed. The Berkeley AMP Lab (Algorithms, Machines and People) put on another great Open Source community building event, with state-of-the-art tech, precision execution, and the sort of fun that comes from a job well done.

Many interesting people, conversations, and of course, big data. This post is perhaps the first in several, because it will take several to even touch on all the angles presented at this intense and very productive camp.

Patterns of communication and publication are emerging and strengthening all the time on the ‘net, and the AMP Lab is in fine form, using a myriad of tech to reach broader audiences and encourage participation.

The AMP Lab Github repository

PostGIS 2.1 on Debian 7

pg_logo

Newly released PostGIS 2.1 rocks.. How can I install it on a fresh Debian 7 ‘wheezy’ to try it out?
Here is a recipe that worked for me:


Final Results
debian_version 7.1
PostgreSQL 9.1.9 on x86_64-unknown-linux-gnu
-----------------------------------------------
myrole=# select postgis_full_version();

POSTGIS="2.1.1dev r11823"
GEOS="3.4.2dev-CAPI-1.8.0 r3897"
PROJ="Rel. 4.7.1, 23 September 2009"
GDAL="GDAL 1.11dev, released 2013/04/13"
LIBXML="2.8.0"
LIBJSON="UNKNOWN"
RASTER


Shell Steps

df -h
sudo apt-get update
mkdir srcs_local
cd srcs_local
sudo apt-get install build-essential flex autoconf libtool gdb gfortran subversion htop
sudo apt-get install postgresql-plpython-9.1 postgresql-server-dev-all python-psycopg2
sudo apt-get install xsltproc libproj-dev python2.7-dev

## GEOS
svn co http://svn.osgeo.org/geos/branches/3.4 geos_34_branch
cd geos_34_branch/
./autogen.sh
./configure
make -j6
sudo make install
ls -l /usr/local/lib
cd ..

## GDAL
sudo apt-get install libcurl4-openssl-dev libgcrypt11-doc
sudo apt-get install libpcre3-dev libjson0-dev libxerces-c-dev libexpat1-dev libxml2-dev
sudo apt-get install libkml-dev

svn co http://svn.osgeo.org/gdal/trunk gdal_trunk
cd gdal_trunk/gdal
./autogen
./configure --with-python --with-curl
make -j6
sudo make install
sudo ldconfig # for good luck

cd ../autotest/
##-- test out the new gdal
python run_all.py

## PostGIS
cd ../..
svn co http://svn.osgeo.org/postgis/branches/2.1 postgis_21_branch
cd postgis_21_branch/

./autogen.sh
./configure
make -j4
sudo make install
sudo ldconfig # for good luck

sudo su - postgres
# psql
> create role myrole superuser createdb login;
exit ## out of linux user postgres shell
createdb myrole
psql

sudo service postgresql restart


The libraries in /usr/local/lib are symbolically linked. It ends up looking like this:
----------------------

libgdal.a
libgdal.la
libgdal.so -> libgdal.so.1.17.0
libgdal.so.1 -> libgdal.so.1.17.0
libgdal.so.1.17.0
libgeos-3.4.2dev.so
libgeos.a
libgeos_c.a
libgeos_c.la
libgeos_c.so -> libgeos_c.so.1.8.0
libgeos_c.so.1 -> libgeos_c.so.1.8.0
libgeos_c.so.1.8.0
libgeos.la
libgeos.so -> libgeos-3.4.2dev.so
liblwgeom-2.1.1dev.so
liblwgeom.a
liblwgeom.la
liblwgeom.so -> liblwgeom-2.1.1dev.so

Sizing Up California – Homes

pg_logo

I live in California, and it’s a big place. I was reviewing some records regarding residential homes. Using some simple stats, I broke the records into partitioned tables in PostgreSQL by county, and then let the rest fall into a general bucket. There is no one correct answer for this kind of analysis setup, but here is one possibility.

CA_tables0

PostgreSQL banter on ‘record pseudotype’

PostgreSQL_logo.3colors.120x120
dmg_83 Okay. I notice that if you a table like CREATE TABLE tbl (x int, y int) and do SELECT (tbl).x, (tbl).y FROM tbl WHERE tbl = ROW(1,2) you’ll indeed get back 1, 2 (assuming such a row exists). That seems a bit weird, since the left side of the expression “tbl = ROW(1,2)” does not seem to be the same as the right, for we can do (tbl).x, but can’t do (ROW(1,2)).x; tbl contains some additional data that ROW(1,2) does not

dmg_83 I’d like to understand the exact rules PG uses for these. I’m guessing it’s similar to something like how python compares a namedtuple and an ordinary tuple (disregarding the names and treating both as tuples for comparison sakes)

RhodiumToad row(1,2) actually uses column names “f1” and “f2” internally but that’s quite difficult to determine (and usually impossible to make use of)
  you can’t do (row(1,2)).f1 for example
  anyway, tbl = row(1,2) works because there’s a generic (record = record) operator defined
  and any composite type can implicitly cast to the “record” pseudotype
  the operator actually looks up the structure of the records at runtime (cached between calls from a single call site)
  the number and types of fields has to be acceptable, but the column names are ignored

PostgreSQL banter on ‘with’

PostgreSQL_logo.3colors.120x120
RhodiumToad with foo(x) as (values (‘blah blah blah’)) insert into wherever select x from foo;
merlinm or, with vars as (select ‘a’ as a, 2 as b) insert into foo values (select a from vars), select b from vars);
merlinm oops, missing a parent there
merlinm gah
RhodiumToad with vars(a,b) as (values (‘a’, 2)) …
merlinm ah, touche
darkblue_b with .. is a ‘materialized subselect’ under the hood ?
RhodiumToad yes
strk not really materialized, but yes
RhodiumToad it is materialized
strk doesn’t persist,is what I mean
strk not after the statement
darkblue_b ah – its a temporary table… perhaps
RhodiumToad no
darkblue_b ok – well I dont want to waste your time.. just grasping at things.
strk darkblue_b: only exists during the single statement
darkblue_b yes I read that
RhodiumToad it exists only within the scope of the query and it can’t have indexes, but it is materialized in that it is evaluated at most once (lazily)
darkblue_b writes that down